Unity environment setup on Windows: installed Unity 2020.3.49f1 (LTS), added required modules (IL2CPP, Android Build Support, OpenJDK), and verified by creating a 3D project.
1. Goal
The goal of this lab is to complete the Unity development environment setup and make sure Unity can run correctly.
2. Environment Information
- Operating System: Windows
- Unity Editor Version:** 2020.3.49f1 (Unity 2020 LTS)
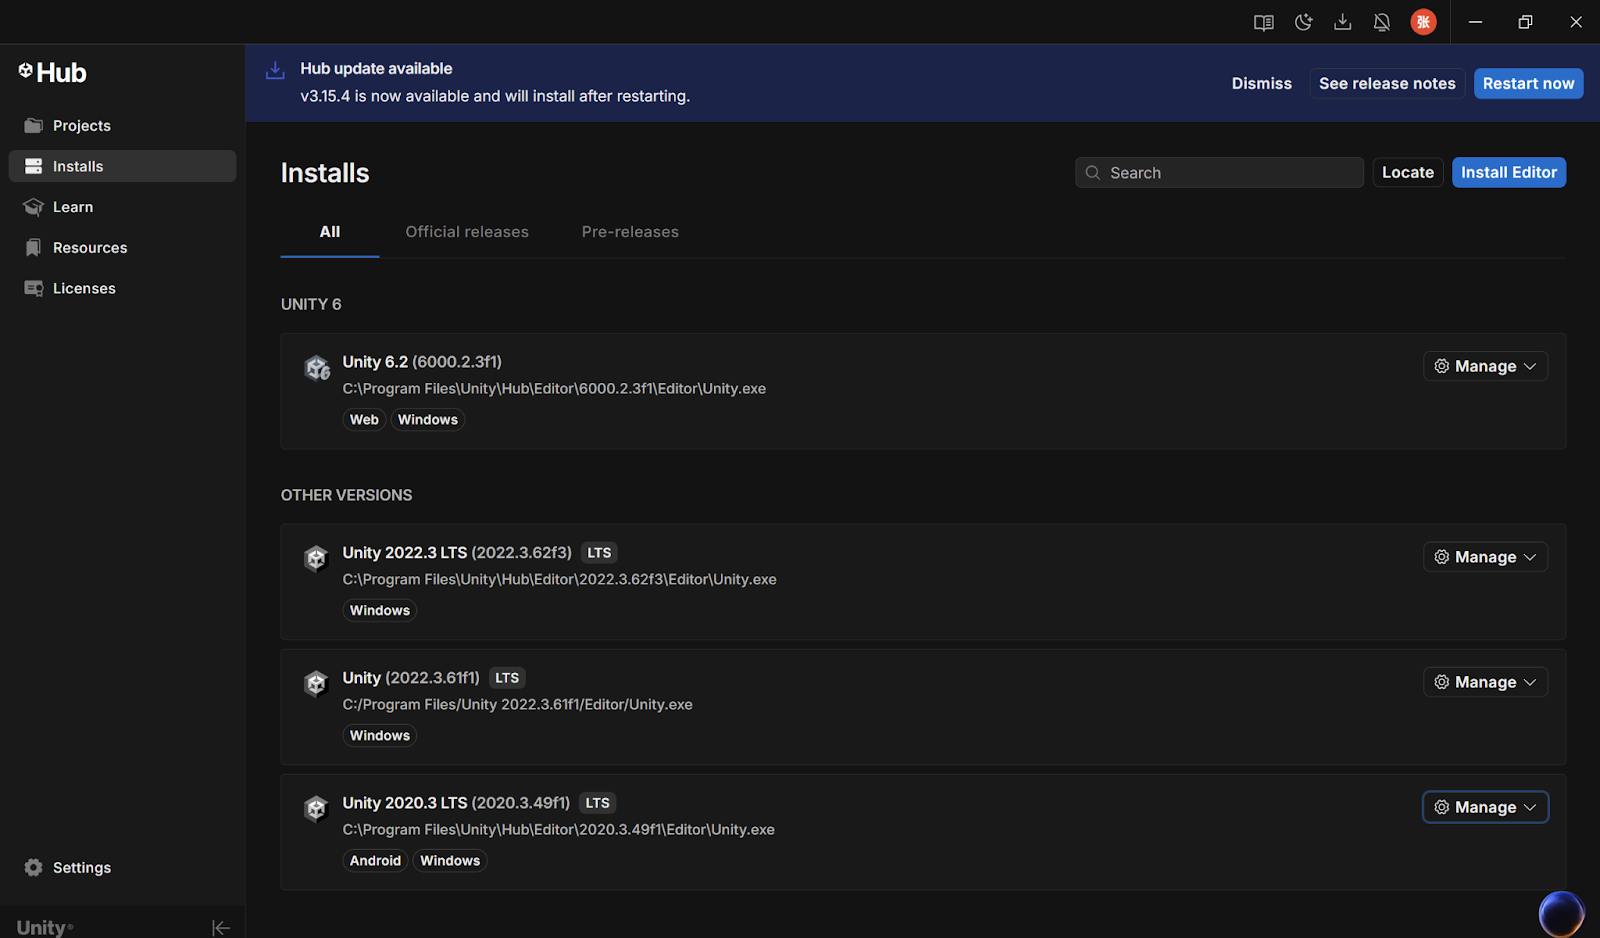
3. Install Unity 2020.3.49f1 and Modules
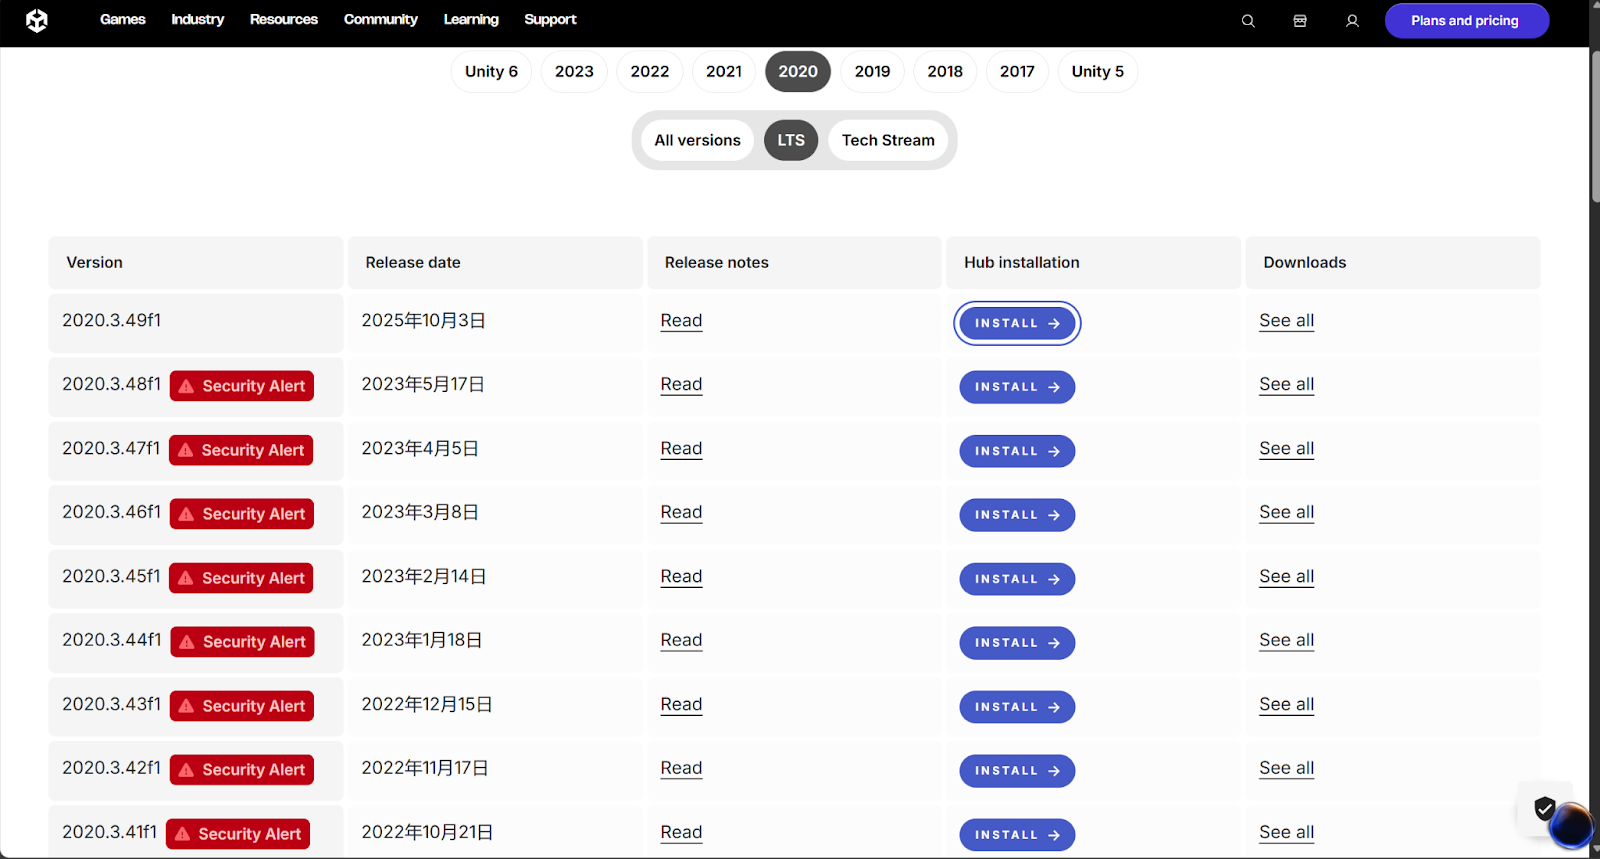
3.1 Install Unity via Download Archive
1. Open the Unity Download Archive website
2. Find Unity 2020 LTS and select version **2020.3.49f1**
3. Click Install and open Unity Hub to start installation
3.2 Select Required Modules
When installing Unity 2020.3.49f1, I selected the following modules:
1. Windows Build Support (IL2CPP)
2. Android Build Support
- Android SDK & NDK Tools
3.OpenJDK
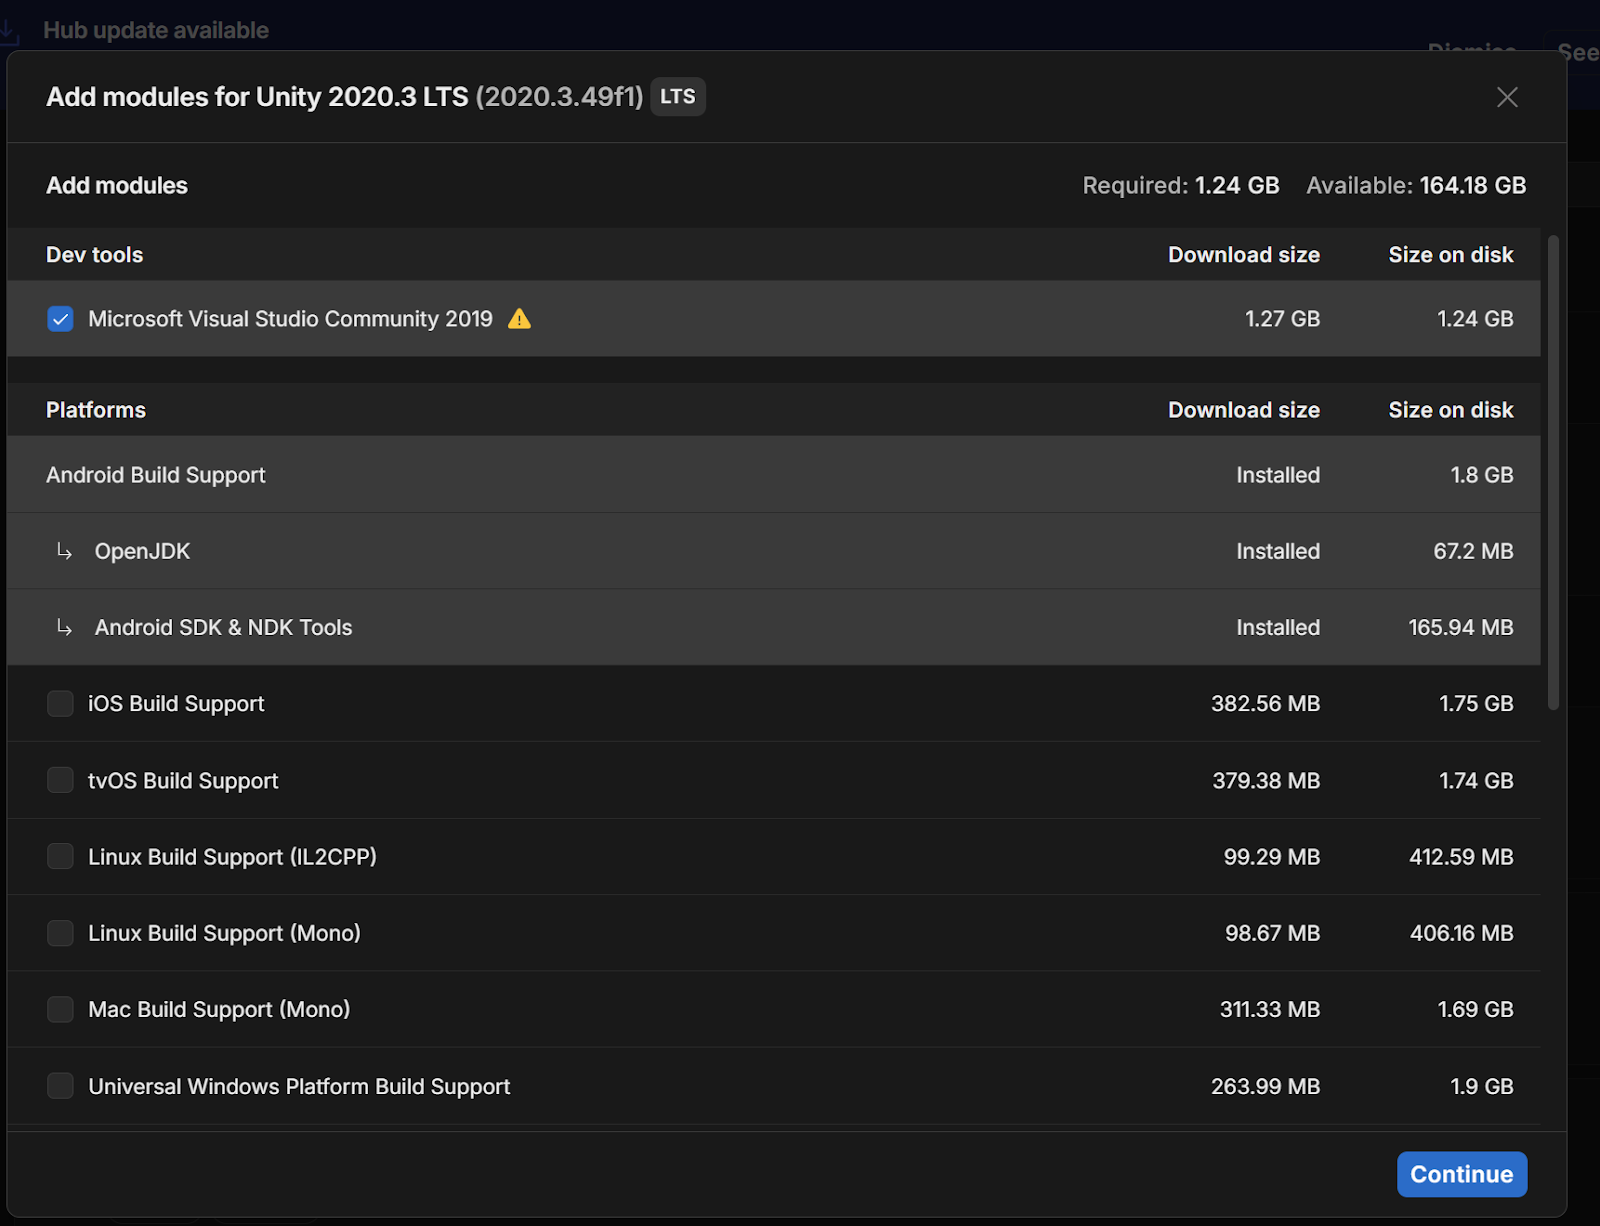
These modules are required for building projects on different platforms.
4. Create and Run a Unity Project (Verification)
4.1 Create a New Project
1. Open Unity Hub Project New Project
2. Select the 3D (or 3D Core) template
3. Set the project name and save location
4. Click Create

4.2 Unity Editor Overview
After the project is created, I verified that Unity runs correctly:
- I can open the project successfully
- I identified the main panels:
-
Hierarchy
-
Scene
-
Game
-
Inspector
-
Console
- I entered Play Mode and the scene ran normally

5. Result
Unity was installed successfully, the required modules were added, and a new Unity project could run without errors.
6. Conclusion
This lab confirms that the Unity development environment is ready. The setup is correct and can be used for future labs and VR experiments.